I purchased this radio in a rural area near Niagara Falls NY. It was a Craigslist listing. The seller would not sell it to me unless I personally came and picked it up. Coincidentally I had a trip planned to Cooperstown, NY. Niagara Falls would be on the way if I took the Canadian route. I sent a check to the owner promising to pick the radio up on a specific day nine months in the future. I offered twice the asking price ($30) if he would keep it for me for the 9 months. The seller agreed and I picked up the radio on the way to Cooperstown. The seller would not take the extra $30, in fact he did not cash my first check until after I picked up the radio. After seeing the radio, I realized it would not have survived shipping by a commercial carrier. The cabinet was in very poor condition. Most of the plywood parts had delaminated due to water damage. It barely hung together in the backseat on the way home from Cooperstown. I set it aside for a couple of years assuming it was a lost cause. At this time I did not know what Arborphone model this radio was.

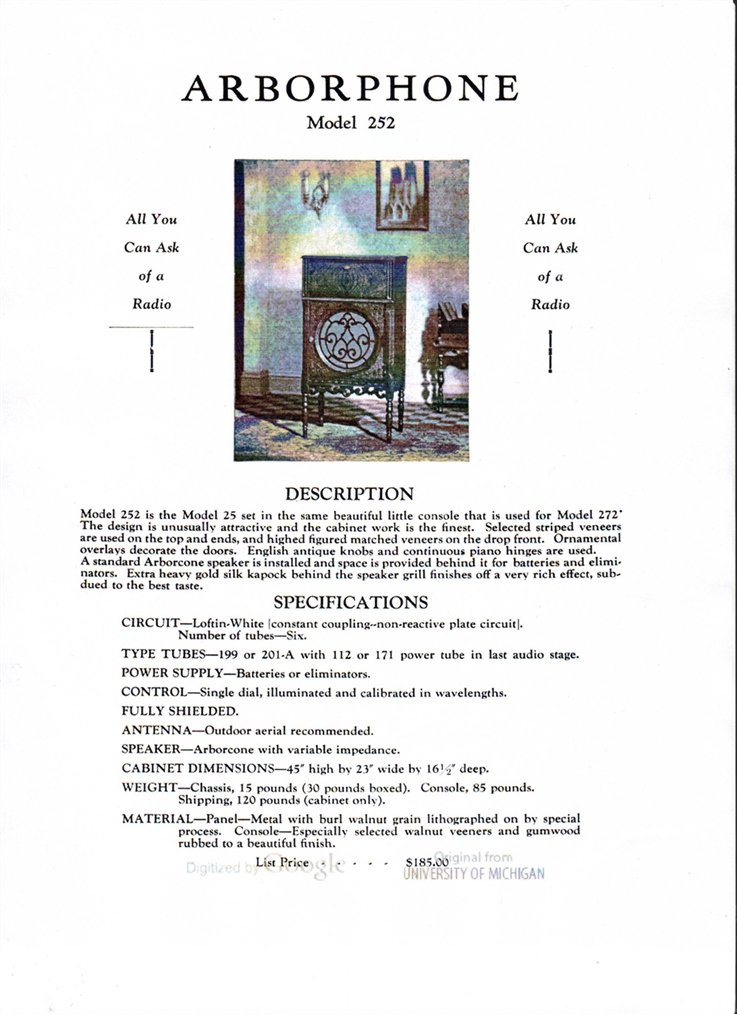
I found some documentation that showed me that this cabinet was used for the model 252 and 272, using the 25 and 27 electronics chassis respectively. This sparked some enthusiasm in me to do something with this radio. The electronics chassis in this radio was not a 25 or 27,, rather it was the same chassis as an Arborphone 45. This particular chassis had been hacked up. The power transformer had been replaced and the metal chassis was cut away to fit it. The push pull output was rewired to a single ended output?
I decided to restore the cabinet as best I could. The side panels had delaminated near the bottom. I forced glue up between the plys and clamped to repair the sides. The rear panel was not repairable. I found a 5/16” piece of aircraft grade plywood. Using the original back as a template, I created a new back piece. I replaced the internal plywood parts with new pieces.
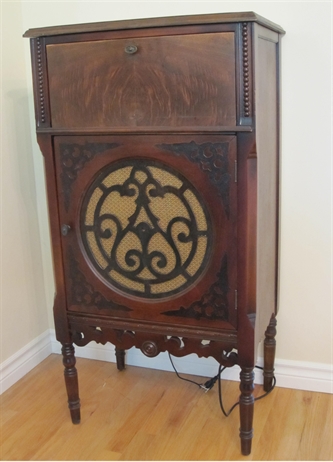
The front “speaker” door was in the worst condition. Some of the sections of the scroll work had broken off and were missing. The four on-lays located in the corners of the door had many broken/missing parts. I was able to restore the missing parts of the scroll work by using the opposite side as a pattern. I was able to scrape off enough on the on-lays and laid out the pieces in my scanner. From this scanned image I was able to make a pattern for the on-lay. I found some burled walnut veneer, and had my artistic daughter cut four new on-lays from the veneer using the pattern with a utility knife.
I decided to restore the cabinet as best I could. The side panels had delaminated near the bottom. I forced glue up between the plys and clamped to repair the sides. The rear panel was not repairable. I found a 5/16” piece of aircraft grade plywood. Using the original back as a template, I created a new back piece. I replaced the internal plywood parts with new pieces.
The front “speaker” door was in the worst condition. Some of the sections of the scroll work had broken off and were missing. The four on-lays located in the corners of the door had many broken/missing parts. I was able to restore the missing parts of the scroll work by using the opposite side as a pattern. I was able to scrape off enough on the on-lays and laid out the pieces in my scanner. From this scanned image I was able to make a pattern for the on-lay. I found some burled walnut veneer, and had my artistic daughter cut four new on-lays from the veneer using the pattern with a utility knife.
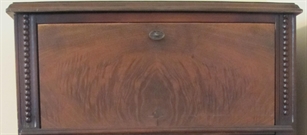
I stripped the finish off the radio with lacquer thinner and steel wool and reapplied a lacquer finish. I did not refinish the pull down door that guards the front panel of the radio. It had book matched veneer so I left it alone. The permanent magnet speaker was mounted on a piece of Masonite that fit behind the speaker door. I’m pretty sure this is not the original state. The speaker works so I left it the way I found it. The hinged top required regluing the veneer down.
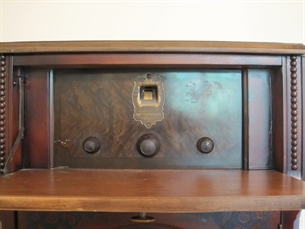
The 45 chassis that came in the cabinet was not good enough to put back into the cabinet. Until recently this radio sat in the dining room, storing linins in place of the chassis. I recently acquired a 2nd Arborphone 25 radio. The cabinet on this radio was in better condition than that of my 1st Arborpohone 25 radio. I decided to remove the chassis of my 1st 25 radio and install it in this cabinet, making a working Arborphone 252. I installed an ARB III in the bottom speaker compartment and run a 171A tube in the final audio output stage.
The 45 chassis that came in the cabinet was not good enough to put back into the cabinet. Until recently this radio sat in the dining room, storing linins in place of the chassis. I recently acquired a 2nd Arborphone 25 radio. The cabinet on this radio was in better condition than that of my 1st Arborpohone 25 radio. I decided to remove the chassis of my 1st 25 radio and install it in this cabinet, making a working Arborphone 252. I installed an ARB III in the bottom speaker compartment and run a 171A tube in the final audio output stage.